medusa-system-agent
Medusa System Agent for exporting site data such as SBO WebReports tables.
Medusa System Agent
Description
Medusa System Agent is a tool that logs into and exports site data from a SQL database as a CSV to local storage. Once the data is cloned to remote storage (by Chimera), System Agent purges the local files.
Medusa is designed to integrate with a cloud backup agent, like Chimera. Chimera can automatically run the System Agent as an executable, before and after each backup job, to prepare the data for upload, then clean up local storage.
Installation and setup
Create a SQL Server read-only user
- Open SQL Server Management Studio and login as a user with
sysadminrole. - In the Object Explorer, expand the database to be exported > Security > Users. Right-click > New User…
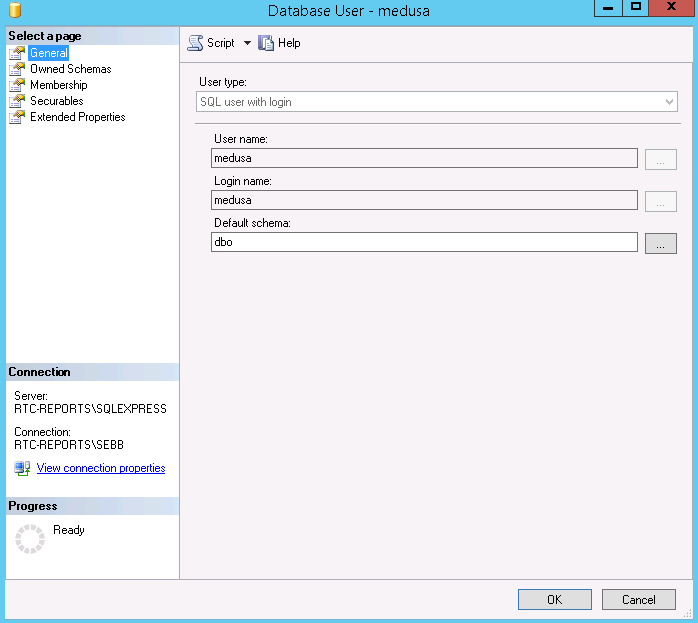
- Under General, enter the
User nameandLogin name. - Under Membership, check
db_backupoperatoranddb_datareader.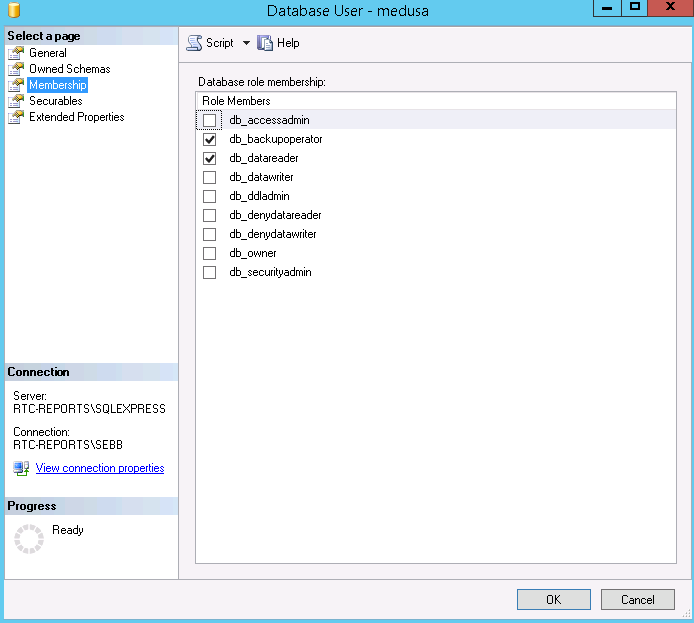
- Click OK.
Generate the configuration file
- In the Medusa dashboard, navigate to the correct facility and select Settings.
- Check “Enable System Agent” and click Download Config. A zip file downloads containing the Medusa System Agent and Chimera config files.
- For custom systems, modify the config files to suit.
Install Medusa System Agent
- Download the latest version Medusa System Agent msi from here.
- On the local server, run Medusa.System.Agent-xxx.msi to install Medusa System Agent.
- Open a new command prompt (medusa-agent has been added to PATH, CMD will need to be reopened to load the new PATH).
- Run
medusa-agentin command prompt. This will instantiate the data directories. - Copy the downloaded Medusa System Agent config.ini into
%programdata%\medusa-agent.
Install Chimera
- Download the latest version of Chimera Backup Agent for Windows from here.
- On the local server, run
chimera-win-xxx.msito install Chimera. - Navigate to
%programfilesx86%\Chimera\Chimera Backup Agent\winserviceand runinstall_service_xxx.bat, wherexxxis the OS architecture. - Copy the downloaded Chimera config,
config.iniinto%programfilesx86%\Chimera\Chimera Backup Agent. The file must be namedconfig.ini. - In Windows Services, start Chimera.
Troubleshooting
- Inspect the log files in
%programfilesx86%\Chimera\Chimera Backup Agent\log. - Inspect the log files in
%programdata%\medusa-agent\log.
Custom deployments
TODO:
- explain config file
- explain how to customize tables
DEVELOPERS
Building from source
Read cx_Freeze documentation.
Run python setup.py bdist_msi
Releasing a new version
- On both a 32-bit and 64-bit development Windows machine, uninstall any existing versions.
- Develop the python application.
- Test the python application.
- On the 64-bit machine:
- Remove any config files or %programdata% directories associated with the production application.
- Build the MSI, see Building from source.
- Run the MSI to install the Windows application.
- Check config is correct and test the Windows application.
- Repeat the above steps for the 32-bit machine.
- If everything passes, tag the git branch with the correct version number (using Semantic Versioning and push to Github:
git tag -a vX.X.X -m "Medusa System Agent version X.X.X"
git add .
git commit -m "release vX.X.X"
git push origin master
- In Github, create a new release, pointing it to the newly created tag. Annotate the release notes.
TODO
- Ditribute latest version of Chimera with Medusa System Agent to ease install and setup.
- Build installer that downloads direct from Medusa that contains pre-populated configuration to install and setup.
- Support multiple database engines, including SQLite.
- Create data directories and copy in files on install.